Docker Powered Development Environment for Your Go App
14 Mar 2015
Docker Powered Development Environment for Your Go Web App Want to get started with Go and develop like the cool kids? I’m going to walk you through getting setup with a docker powered development environment that rebuilds as you make modifications locally. A complete example is available on GitHub for those that want to skip a-head.
The advantages of using a tool like Docker is that it provides you with a simple way to create a repeatable, shareable and deterministic development environment. This becomes increasingly valuable as you scale the number of people working on a project.
On top of this a lot of cloud vendors now allow you to directly upload and run docker containers making it easier to maintain consistency between production and development environments.
Step One: Dependencies
First of all you’ll need to download all the dependencies. Fortunately, I’ve listed them below with links to guides on how to install them.
- Docker (Mac OS X) (See note re: Mac OS X below)
- Docker (Ubuntu)
- Go (Post written for Go v1.4.2)
NOTE: Mac OS X users will need to install Boot2Docker which is a wrapper around VirtualBox that provides a Linux guest to run containers. Instructions are provided in the Mac OS X link above.
Step Two: The Little HTTP Server that Could
Once we’ve got all of our tools, we can write our sample application that we’ll be containerizing with docker.
First we’ll need a place for our code to live.
# Create a directory for our example app and then make it our
# working directory.
mkdir example-app
cd example-app
Now open a file called main.go with your favourite text editor.
package main

import (
    "os"
    "log"
    "fmt"
    "net/http"
)

func handler (w http.ResponseWriter, r *http.Request) {
    log.Println("Received Request: ", r.URL.Path)
      fmt.Sprintf(w, "Hello World!")
}

func main () {
    http.HandleFunc("/", handler)

    port := os.Getenv("PORT")
    if port == "" {
      log.Fatal("PORT environment variable was not set")
    }

    err := http.ListenAndServe(":8080", nil)
    if err != nil {
      log.Fatal("Could not listen: ", err)
    }
}
You should be able to build and run this application.
PORT=8080 go run main.goYou can test the application by visiting http://localhost:8080 in your web browser. You should see “Hello World!” with log lines appearing in your console.
Step Three: Your first Dockerfile
It’s time to write your first Dockerfile (a file that tells docker how to build your container).
Create a Dockerfile in your example-app directory by opening it in your favourite text editor and entering the following code block. The in-line comments explain the purpose of each stanza.
# Base this docker container off the official golang docker image.
# Docker containers inherit everything from their base.
FROM golang:1.4.2

# Create a directory inside the container to store all our application and then make it the working directory.
RUN mkdir -p /go/src/example-app
WORKDIR /go/src/example-app

# Copy the example-app directory (where the Dockerfile lives) into the container.
COPY . /go/src/example-app

# Download and install any required third party dependencies into the container.
RUN go-wrapper download
RUN go-wrapper install

# Set the PORT environment variable inside the container
ENV PORT 8080

# Expose port 8080 to the host so we can access our application
EXPOSE 8080

# Now tell Docker what command to run when the container starts
CMD ["go-wrapper", "run"]
Now you should be able to build and run the container.
NOTE: If you are running on Mac OS X you’ll need to start boot2docker using the start command. It will print out a list of environment variables. Make sure to export these to your shell session.
# Build the docker image for our application, remove any
# intermediate steps and tag the result as "example-app"
docker build --rm -t example-app .

# Now that we have an image we can create and start a container,
# which is an instance of an image. This container will forward
# port 8080 from the container to the host.
#
# It will have the name test and is based off  the "example-app"
# tag. Finally, we'll run it in detached mode (backgrounded).
docker run -p 8080:8080 --name="test" -d example-app
You should now be able to view the hello world application in your web browser by navigating to http://localhost:8080.
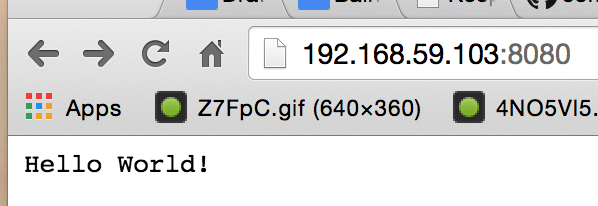
NOTE: If you’re running on Mac OS X, the docker container is running inside the Linux Guest. By default this should be http://192.168.59.103:8080, otherwise run the boot2docker ip command to get the guests ip address.
Congratulations, you now have a containerized Go development environment that is repeatable and deterministic.
You can now use docker to start, stop and check the status of your container using the following commands.
# List all containers (start and stopped)
docker ps -a

# Start a container using it's id (retrieved using above cmd)
docker start $CONTAINER_ID

# Stop a container using it's id (retrieved using above cmd)
docker stop $CONTAINER_ID
Step Four: Auto-Rebuild
It really sucks having to rebuild your docker image, stop the old one, and run the new one every time you make code changes. So we’re going to leverage docker volumes and a neat little tool called Gin to make this a non-problem.
Volumes provide us with a mechanism for sharing a folder between the host and container. This way you won’t have to rebuild to propagate changes inside the container.
Gin is a tool that detects if changes have been made to any source files and then rebuilds the binary and runs the process. At it’s core is a HTTP Proxy that is responsible for triggering the build when a new HTTP request is made and changes have been detected.
First we’ll have to make some simple changes to our Dockerfile by installing Gin and ensuring we execute Gin as our entry command. One major difference is that we’re now exposing port 3000 instead of 8080 as the Gin proxy will listen externally on 3000 and forward the traffic internally to port 8080 (the port our web application listens on).
# Base this docker container off the official golang docker image.
# Docker containers inherit everything from their base.
FROM golang:1.4.2

# Create a directory inside the container to store all our application and then make it the working directory.
RUN mkdir -p /go/src/example-app
WORKDIR /go/src/example-app

# Copy the example-app directory (where the Dockerfile lives) into the container.
COPY . /go/src/example-app

# Download and install any required third party dependencies into the container.
RUN go get github.com/codegangsta/gin
RUN go-wrapper download
RUN go-wrapper install

# Set the PORT environment variable inside the container
ENV PORT 8080

# Expose port 3000 to the host so we can access the gin proxy
EXPOSE 3000

# Now tell Docker what command to run when the container starts
CMD gin run

Alright, now we can build the image and start a container. However, this time we’re going to be leveraging docker volumes and exposing a different port.

# Build the image just as we did before (--rm writes over previous versions)
docker build --rm -t example-app .

# Expose port 3000 and link our CWD to our app folder in the
# container. Your current working directory will need to be the
# root of the example-app directory.
docker run -p 3000:3000 -v `pwd`:/go/src/example-app --name="test" -d example-app
NOTE: If you are a Mac OS X user your application directory will need to be a child of /Users. For more information, please read the volume documentation.
You should now be able view your application at http://localhost:3000. If you make any changes the application should rebuild the next time you refresh your view.
There you have it, your very own containerized development environment for your web application written in Go!